注意
前往結尾下載完整範例程式碼。或透過 JupyterLite 或 Binder 在您的瀏覽器中執行此範例
識別腳本中的函式名稱#
這展示了 Sphinx-Gallery 如何識別以下情況:
在程式碼區塊中使用函式/方法/屬性/物件或實例化的類別
在文字區塊中使用 sphinx 標記引用函式/方法/屬性/物件/類別。
Sphinx-Gallery 會檢查執行的程式碼本身以及文字區塊(例如這個或下面的區塊)中的這些引用,並識別它們所屬的模組。這表示在這裡寫 numpy.sin 和 numpy.exp,即使它們沒有在程式碼中使用,也會被識別。當函式回傳類別時(表示它沒有明確實例化),這特別有用 – 如果您將它們添加到使用它們的範例的文檔區塊中,它們將被添加到反向引用中。
此功能用於為您的程式碼新增文檔超連結(將 intersphinx 連結新增至您的範例)以及用於迷你範例展示的建立(為 API 文檔新增迷你範例展示)。
# Code source: Óscar Nájera
# License: BSD 3 clause

import os.path as op  # noqa, analysis:ignore

import matplotlib.pyplot as plt

import sphinx_gallery
from sphinx_gallery.backreferences import _make_ref_regex, identify_names
from sphinx_gallery.py_source_parser import split_code_and_text_blocks

filename = "plot_6_function_identifier.py"
if not op.exists(filename):
    filename = (
        __file__
        if "__file__" in locals()
        else op.join(op.dirname(sphinx_gallery.__path__[0]), "examples", filename)
    )

_, script_blocks = split_code_and_text_blocks(filename)

names = identify_names(script_blocks, _make_ref_regex())
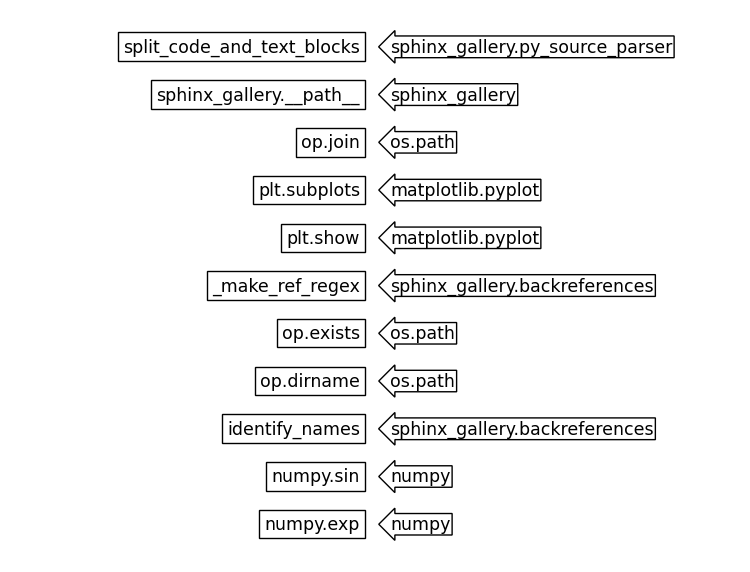
在上面的程式碼區塊中,我們使用內部函式 identify_names 從此檔案取得所有識別的名稱及其完整解析的導入路徑。然後我們在下面繪製它,其中識別的名稱函式在左邊,而完整解析的導入路徑在右邊。
fontsize = 12.5
figheight = 3 * len(names) * fontsize / 72
fig, ax = plt.subplots(figsize=(7.5, figheight))
ax.set_visible(False)

for i, (name, obj) in enumerate(names.items(), 1):
    fig.text(
        0.48,
        1 - i / (len(names) + 1),
        name,
        ha="right",
        va="center",
        size=fontsize,
        transform=fig.transFigure,
        bbox=dict(boxstyle="square", fc="w", ec="k"),
    )
    fig.text(
        0.52,
        1 - i / (len(names) + 1),
        obj[0]["module"],
        ha="left",
        va="center",
        size=fontsize,
        transform=fig.transFigure,
        bbox=dict(boxstyle="larrow,pad=0.1", fc="w", ec="k"),
    )

plt.show()
腳本的總執行時間: (0 分鐘 0.732 秒)
預計記憶體使用量: 176 MB